Last year I picked up this chinese tablet. I thought it’d be nice to have a dual-boot Windows 10 / Android device around. I was wrong.
The experience I had with this tablet is a topic for another day, but one of the problems I faced was the lack of space. A mere 32GB of storage is barely enough for Windows 10, let alone a dual-boot system.
The “Anniversary Update” and the more recent “Creators Update” just made things worse and many users were unable to even download them due to lack of space on the system drive. A simple “Disk Cleanup”, or even CCleaner weren’t enough, so I just had to resort to some more extreme methods.
This is not the whole story
What I found actually did the trick in the end. I kept a record of what I did and moved on.
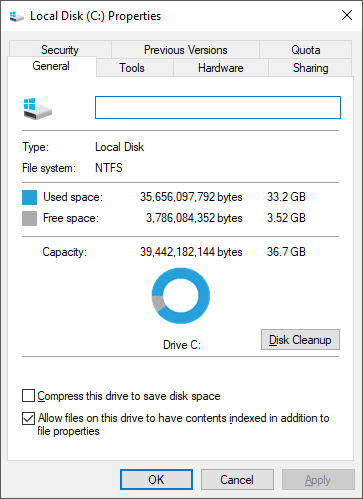
Today, I noticed that my old HP laptop, on which I installed Windows 10 on an old 40GB Intel SSD (it was unbearable to work on with a normal HDD) had only 3.5GB left.
I’ve set up this system a couple of months ago right when the “Fall Creators Update” went live. Besides Photoshop and Ubuntu subsystem there’s nothing big installed, and updates were installed regularly (whenever I actually used it) but I haven’t cleaned it even once since installation.
Windows components
Windows is built from many different components stored at c:\Windows\WinSxS. The “Component Store” (that’s how Microsoft is calling it) can get very large with updates, since apparently it also stores lots of backups. Microsoft has got a better explanation exactly on that over on their website.
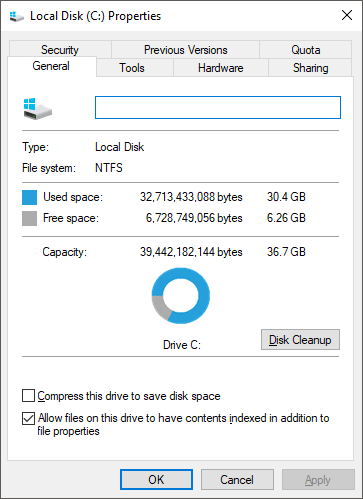
By running this cleanup I managed to get my free space up to 6.2GB - effectively saving 2.7GB of storage. On my Teclast tablet, by the way, I managed to save around 6GB with the same technique (but that also included a service pack cleanup which I didn’t have on this system).
Okay enough talking, show me how!!!
Running an elevated Windows PowerShell (right-click on Start menu → Windows PowerShell (Admin)), first it’s possible to analyze the Component Store:
Dism.exe /online /Cleanup-Image /AnalyzeComponentStore
The output will of course vary from system to system, but here’s an example:
PS C:\Windows\system32> .\Dism.exe /online /Cleanup-Image /AnalyzeComponentStore

Deployment Image Servicing and Management tool
Version: 10.0.16299.15

Image Version: 10.0.16299.214

[==========================100.0%==========================]

Component Store (WinSxS) information:

Windows Explorer Reported Size of Component Store : 6.87 GB

Actual Size of Component Store : 6.77 GB

    Shared with Windows : 6.00 GB
    Backups and Disabled Features : 568.67 MB
    Cache and Temporary Data : 195.98 MB

Date of Last Cleanup : 2018-02-02 22:21:16

Number of Reclaimable Packages : 1
Component Store Cleanup Recommended : Yes

The operation completed successfully.
Note: This is the result after running the cleanup. Didn’t save the before output, sorry!
Next there are two possible Component cleanup options. The former removes old versions of components, while the latter cleans up further, disabling the option to uninstall any update made to the system.
Dism.exe /online /Cleanup-Image /StartComponentCleanup
Be Careful! The following command will make it impossible to uninstall any update made to the system!
Dism.exe /online /Cleanup-Image /StartComponentCleanup /ResetBase
Finally, to cleanup old service pack components, the following command can be used in addition to either of the above:
Be Careful! The following command will make it impossible to uninstall any update made to the system!
Dism.exe /online /Cleanup-Image /SPSuperseded
Those interested in reading more about this can check out Microsoft’s website.